|
| LAMINATED HAND- HOLDS |
|
I spent the extra time to make some very strong laminated hand-holds on each side of the main-cabin at the base of the companionway stairs. These hand-holds are both very strong and look great. This page shows the steps I took to make these handles. I first cut thin strips the width and length I needed to make the hand-hold. For hardwoods like maple and birch, 1/8" or slightly less for thickness is about right. For the pictures shown, the strips are 1 5/8" wide and about 3/32" thick. The strips were cut on a bandsaw with a 3/4" wide blade, this gives the surface a rough feel but smooth enough for gluing without voids. The two strips that face outward are sanded to 240 grid, it will be hard to sand them later (unless you have a oscillating spindle sander). | ||||
| ||||
|
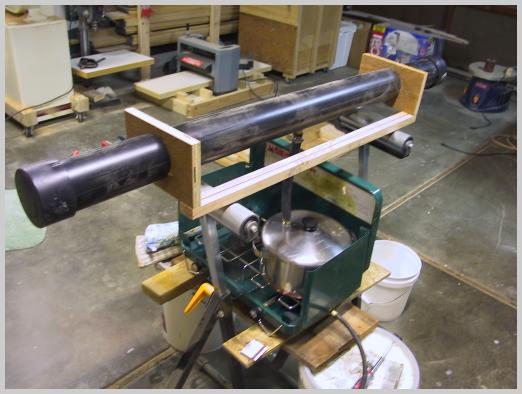
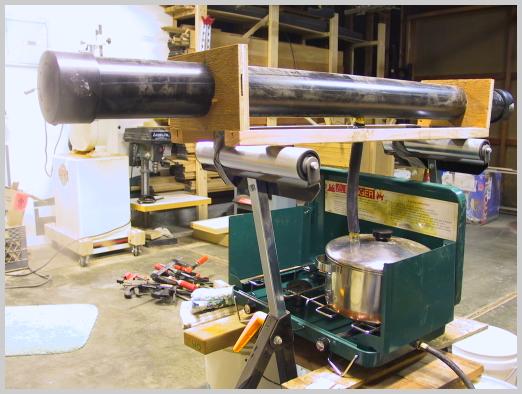
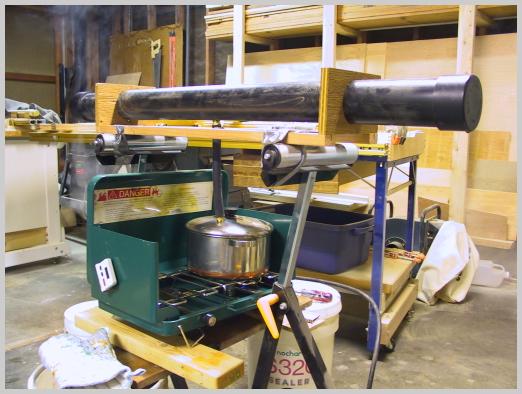
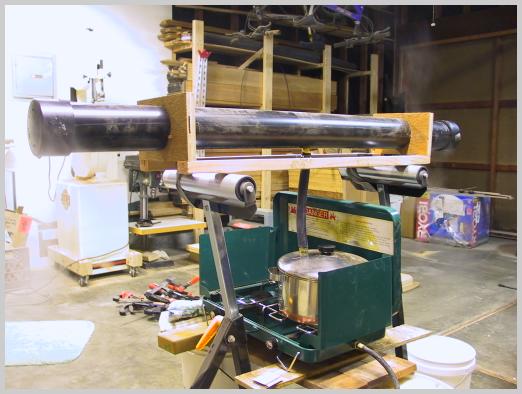
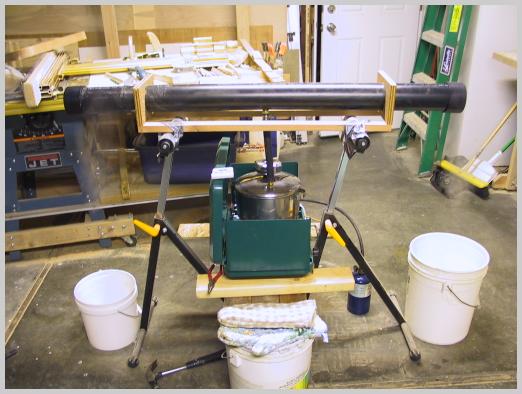
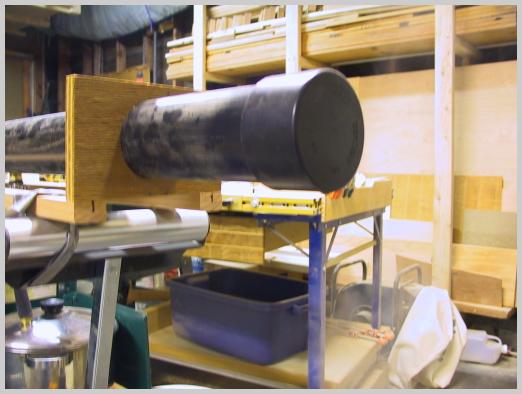
Next I built a steamer from some 3" ABS pipe (ABS for the high heat), two end caps, some 3/4" pipe to hose fittings, some radiator hose (for the high heat) and a used pan with lid. I mounted the steamer to a sturdy mount, you don't want something this hot moving while it is operating. In the pictures I have a wood mount which ic duct taped to a couple roller stands. The pan is arranged to sit on a camp stove and the hose connects the lid to the steamer. | ||||
 Steamer Specs
| ||||
|
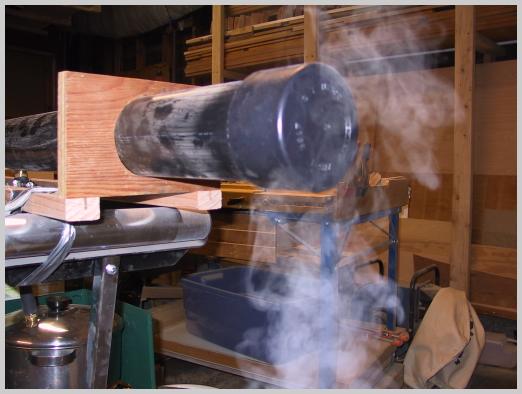
Adding energy to a closed system is bad practice. The opening in this system is two 1/8" holes drilled into the two endcaps of the steamer. When the steamer is running, steam (and some condensed water) shoots out of these holes. I put a hole at each end, that way I can tell if steam is getting to each end of the steamer evenly. The holes are at the bottom of each cap so any water that condenses inside the steamer can drain out. Another useful tip is to heat the pan of water up to boiling on a normal stove first, this will save fuel and time (my kitchen stove puts out more BTUs than my camp stove). | ||||
 Steamer
|
 Steamer
|
 Steamer
| ||
 Steamer
|
 Steamer
|
 Steamer
| ||
 Steamer
| ||||
|
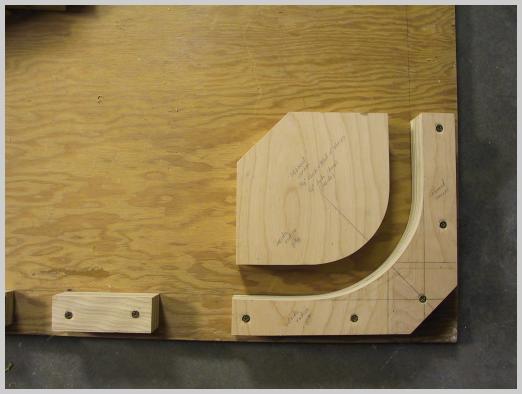
I steam all the strips for a handle in one batch and put them in the mold together. There is a piece of wood I use as a shelf inside the steamer to keep the strips of wood up off the bottom. This way they get steamed and are not sitting in water. A bending jig then is used to hold the wood to shape as it cools. I made the bending jig from plywood layered up to make it thick enough be the same as the strip width. The inner and outer radius of the jig is made to account for the sum of the strip thicknesses. For example, if you want a handle 1" thick, the difference between the radiuses for the outside corner and inside corner of the jig is 1". | ||||
 Corner radius
|
 Bending jig
|
 Closeup
| ||
|
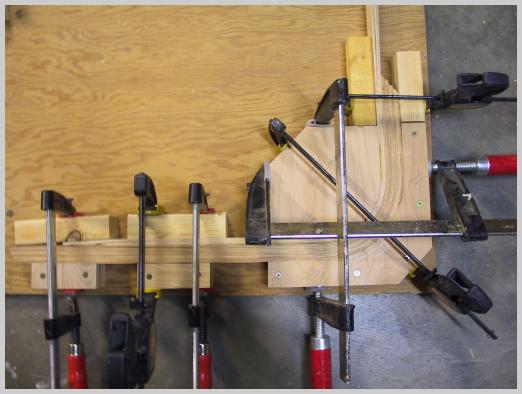
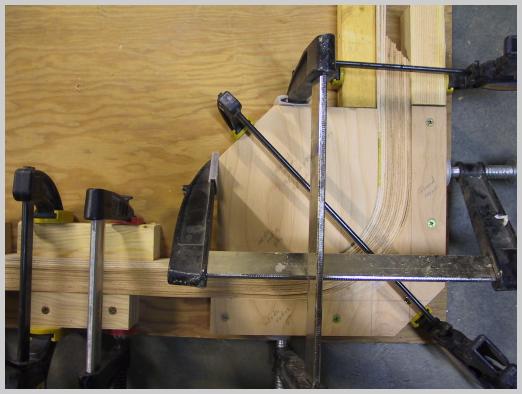
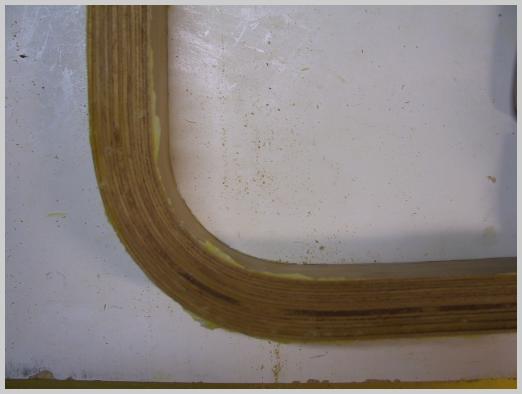
Once the strips have cooled and dried (I give them overnight, you can get away with less), I glue them up. You want enough glue to cover the surface of every strip but not too much since most will squeeze out. I use a brush to spread the glue out evenly. The bending jig is then used to hold the wood while it is glued up. I use wax paper to line the faces of jig. The glue from all the surface areas squeezes out quite a bit so the wax paper prevents the strips from getting stuck to the jig. One problem I have is that the top edge of the strips dries well since it is exposed to air but the downward facing edge is wrapped in wax paper and so does not dry as well. It has not been a problem so far, after the top is dried I peel back the wax paper and let the bottom dry. | ||||
 laminated corner
|
 laminated corner
|
 laminated corner
|
||
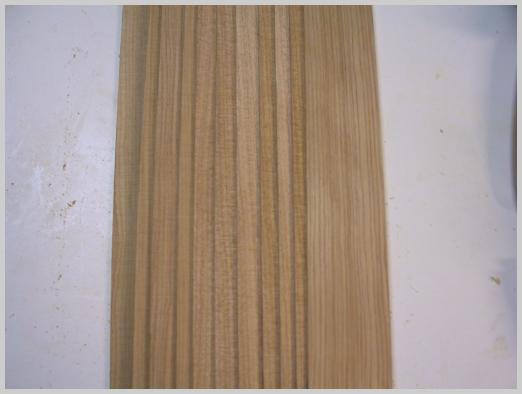
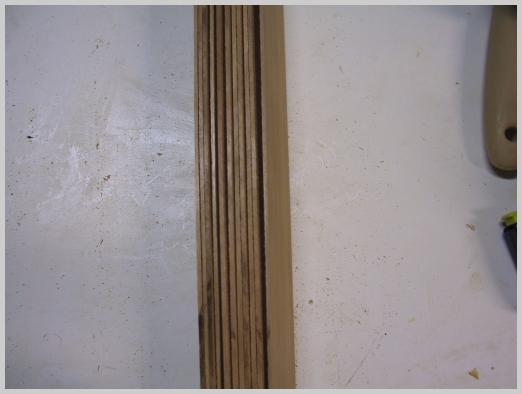
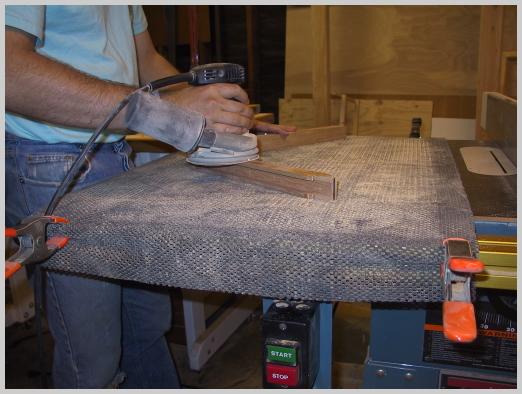
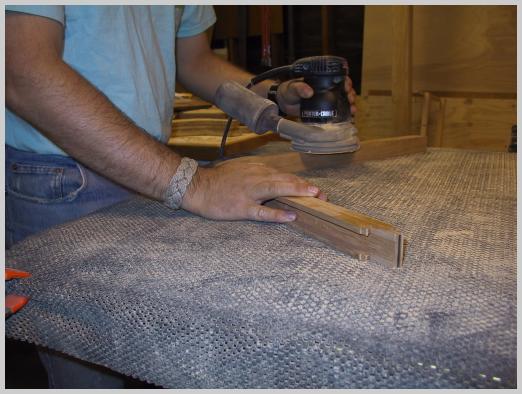
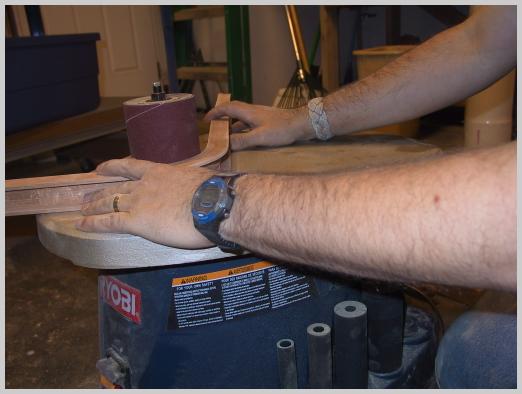
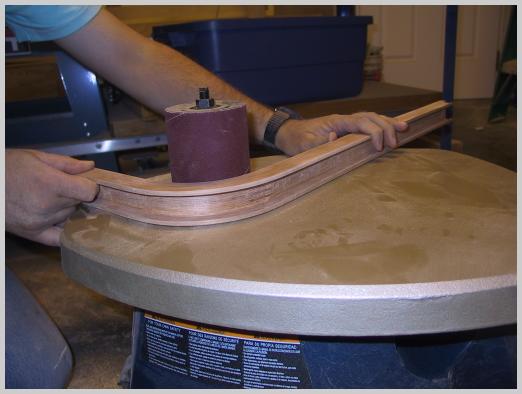
|
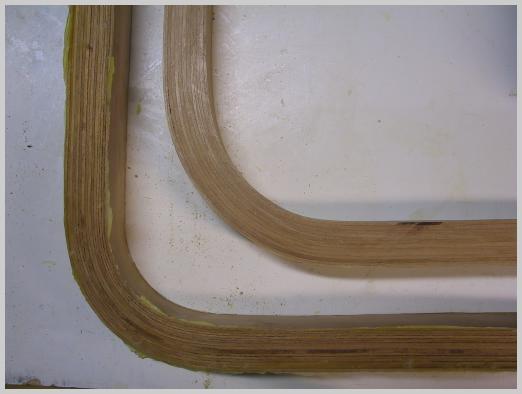
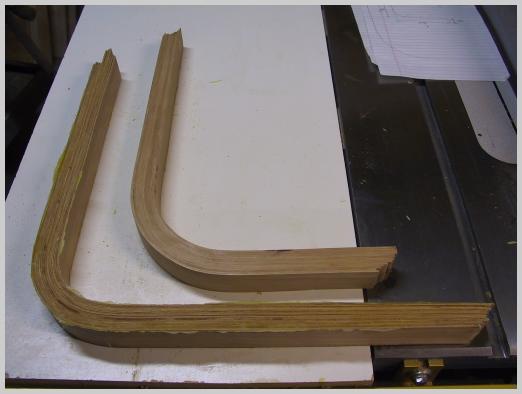
Next I clean up the uneven strip edges with a table saw. In the pictures above, the cleaned up handle is the top one. The bottom one is fresh out of the mold, you can see the slight variation in how the strips are aligned with each other and some extra glue that squeezed out. After the edges are trimmed, I sand the sides of the handle with a random orbital sander. The inner and outer edges are sanded with an oscillating spindle sander. The spindle sander helps keep the edges square to the curvature of the handle. | ||||
| ||||
| ||||
|
Finally, I round over the corners with a 1/8" round-over bit. It is tempting to use a larger round-over bit (to go for a round profile) but we find that the 1/8" bit lends a nice strong feel to the hand-hold. | ||||
|
I then cut a dado into the hand-hold for mounting along the edge of a bulkhead. Depending on your application, you may not need this. | ||||
|
Since these are hand-holds, the installation needs to be very strong. I use a 3/8" drill to make the screws heads counter-sunk so they can be filled with plugs. I use 2" stainless screws to hold the handle to the bulkhead, the handle serves as double duty as trim and handle. | ||||